A detailed example process
A fuller seven-phase process to adapt, with the reasoning behind each phase.
New teams start from the built-in process, which has four phases and is enough to get a first contribution moving. See Create a process.
This page is the longer version: a seven-phase process, and the thinking behind each phase. Take the parts that fit your team and leave the rest. Phase names are yours to choose, so treat everything below as an example, not a standard.
What a process is for
A process does two jobs at once.
For the design system team, it shows where each contribution stands, because every contribution follows the same named phases. For contributors, it says what has to happen next, so someone picking up a half-finished component can see where it was left.
The same process reaches every widget in the team, so every designer sees the same checks.
Goals worth setting
Before writing phases, decide what you want the process to do.
Outline the work. Put phases and checks in the order the work actually happens. Our article on keeping design system contributions in check covers this.
Govern contributions. Write checks as questions you want answered. Did the contributor try the existing components first? Did they apply the change to the other known use cases? Did they read the documentation?
Hold quality. Name the standards a contribution has to meet: connected tokens, auto layout, properties named the same way development names them.
New systems and evolving systems need different middles
A new design system has no agreed baseline yet, so the process has to absorb the design that already exists. The biggest job is removing discrepancies between what is in the files today and what the system will support.
That agreed baseline is worth naming. We call it the status quo: the accepted current state of a component that has been through the process.
An established design system uses the consolidation phase differently. A contributor first tries to solve their problem with the components of the status quo. Only when that genuinely fails do you consolidate their new idea with the old. Our article on how to govern a design system goes into this.
Consolidation
Consolidation is where discrepancies get removed. Gather every version of the component that exists, so you can see how it is really used. Then decide on one solution: what you will support, how you will support it, and what has to change.
Governance
Ask the contributor to try the status quo components first. When they need a change to support their case, that is the moment to consolidate the new idea with the old. Will the new solution still support every other usage? Does it still fit the component's purpose? Our article on a collaborative approach to defining components and their features covers the conversation.
Why alignment has its own phase
A design system is often called the source of truth, but that truth is spread across Figma, the code and the documentation. Changes arrive in all three. Keeping them aligned is the work.
Property alignment is a session where developers and designers look at every instance of a component together, name its anatomy and structure, and agree its properties and values.
Figma supports most of the property types code uses: enums for lists, booleans for true or false, strings for text. So a list of variants becomes an enum (primary, secondary, tertiary), an inverted state becomes a boolean, and a button label becomes a string.
Definition of Ready
A Definition of Ready, often shortened to DoR, is the point where a design is finished enough to be built. Once everything is aligned, the contributor folds in the changes and delivers the final design.
It helps to keep a repository for new components and put the Figma link on each component's Definition of Ready. The component then gets named consistently, and the developer lands in the right file.
Watch for bottlenecks
Avoid turning a process into a waterfall. Ask what can happen at the same time, what one person can finish alone, and where you genuinely need a meeting.
The flow below needs only two meetings. After the Definition of Ready is delivered, documentation and development can run side by side.
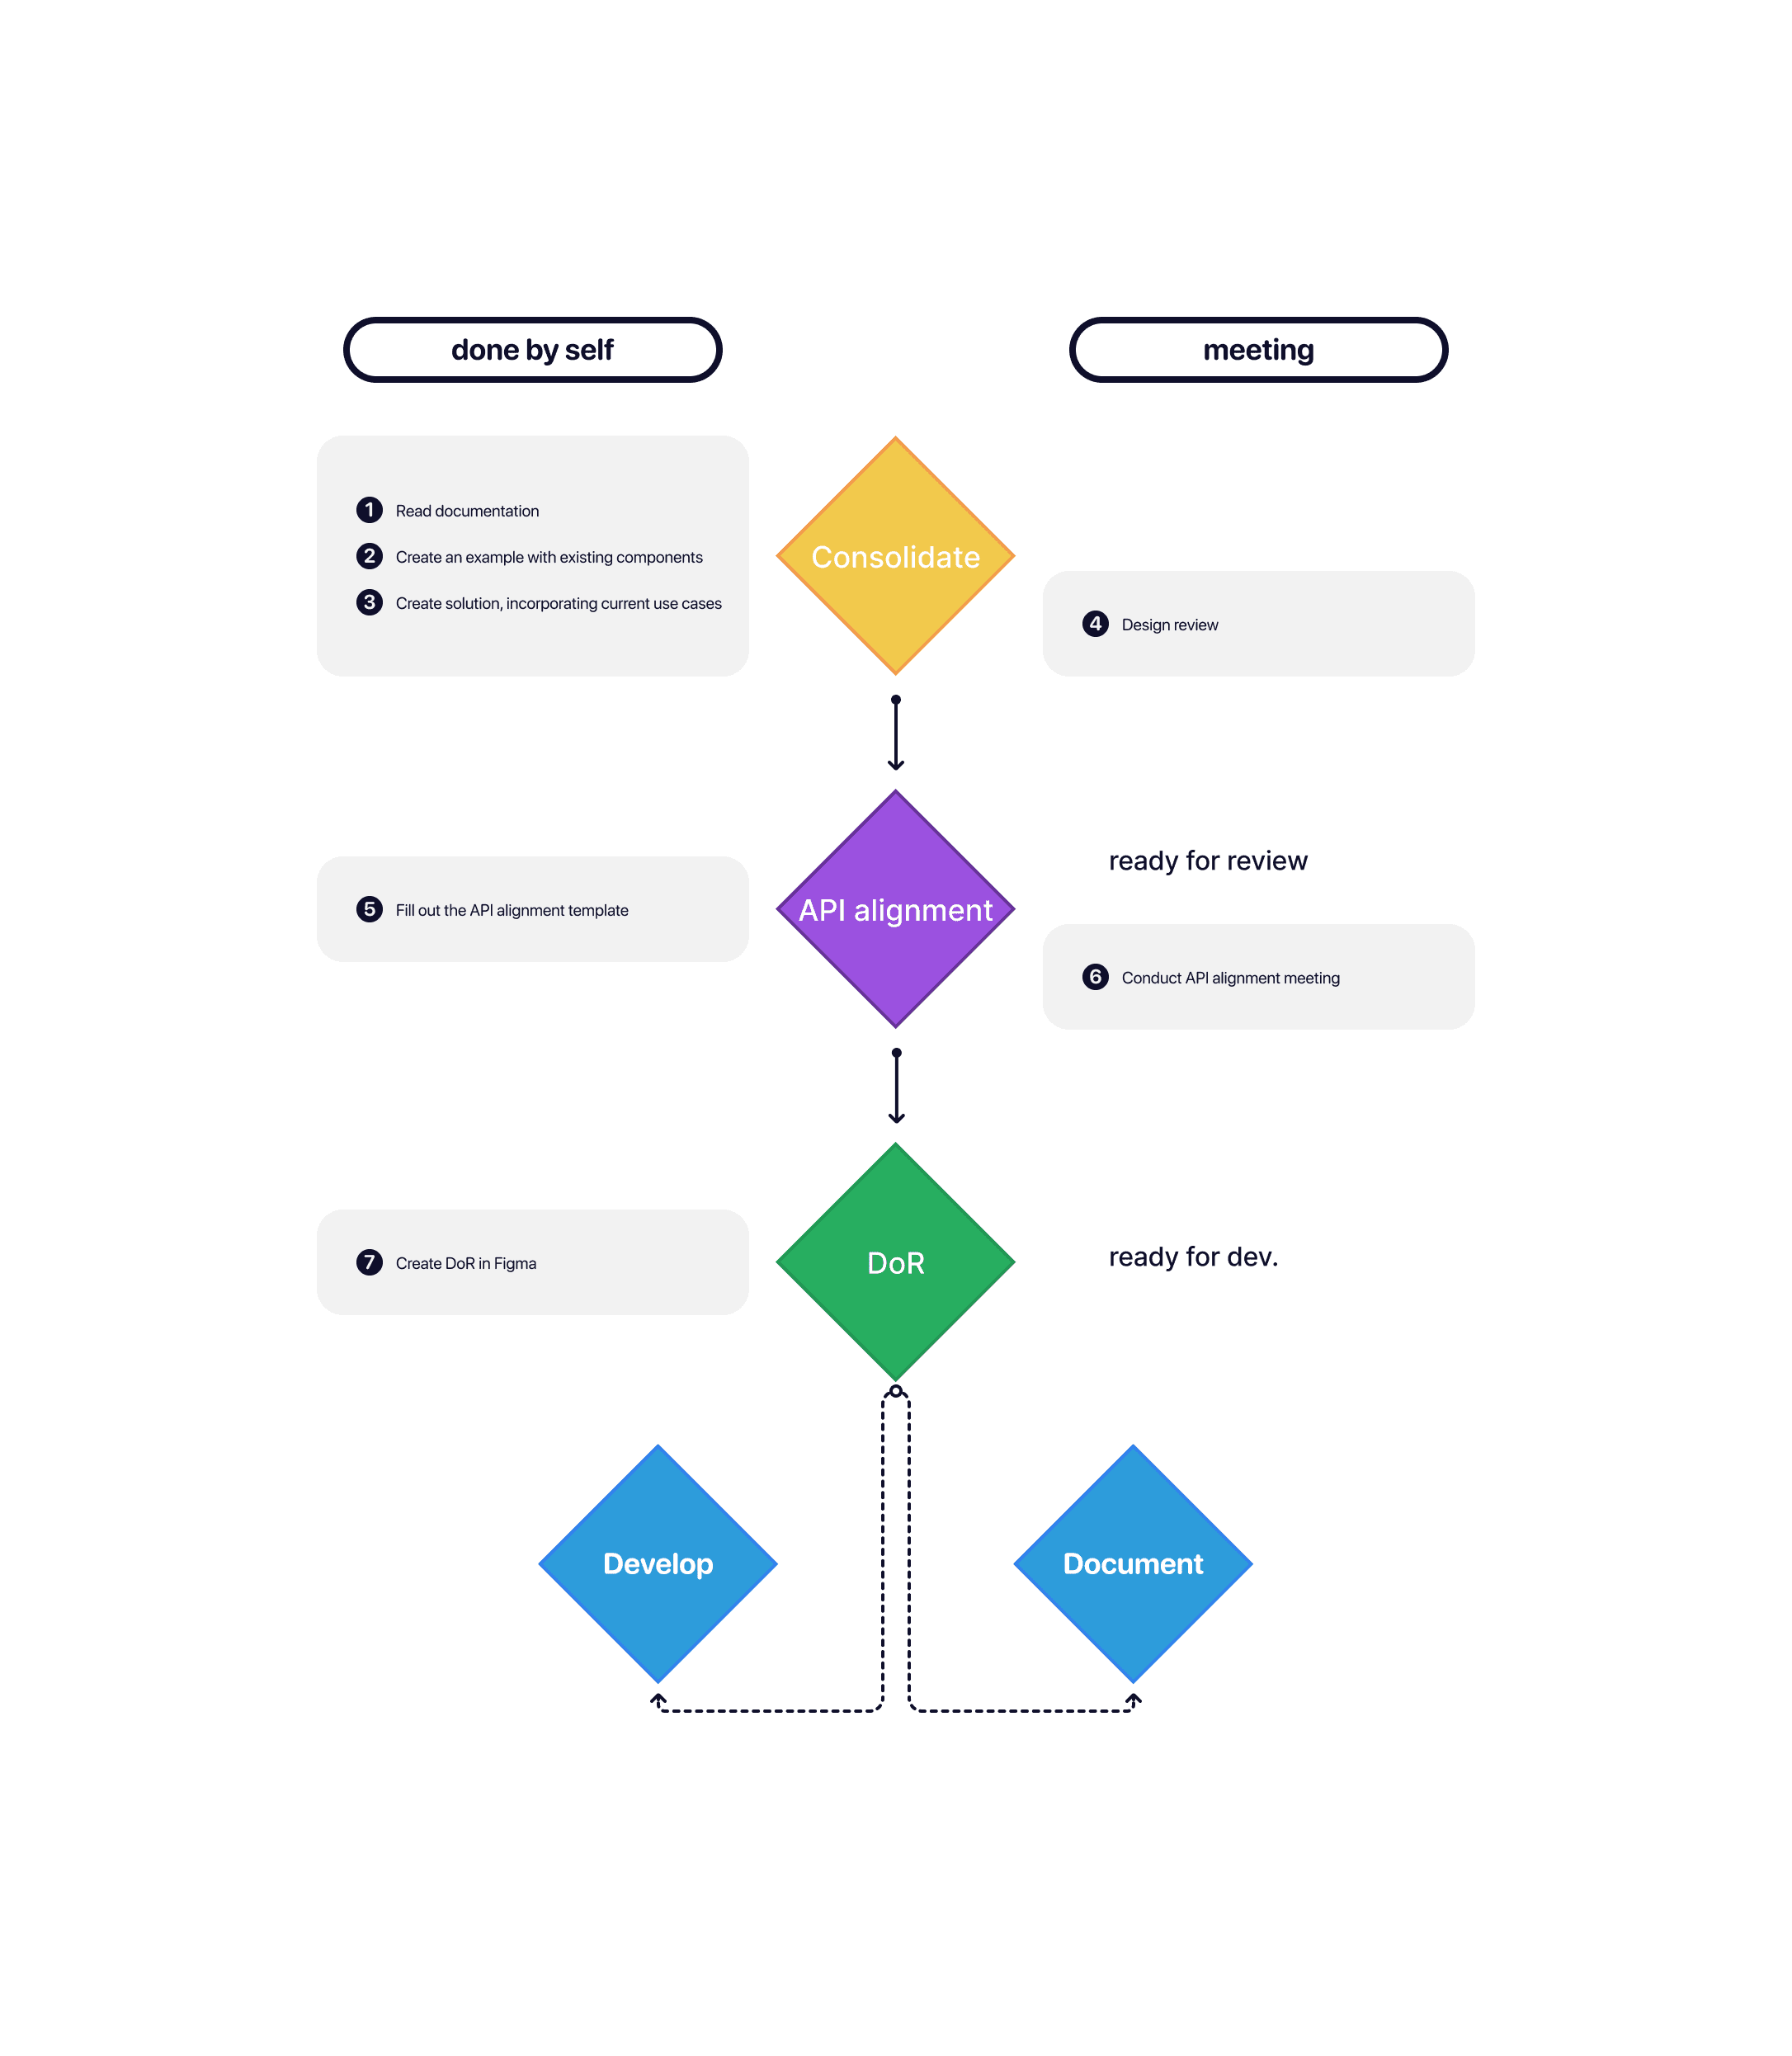
The seven phases
Prepare design
- Apply fundamentals
- Create the default component
- Add states, types and options
- Add breakpoint behavior
Consolidate design
- Gather use cases
- Compare against other design systems
- Write a rationale
- Hold a consolidation meeting
- Adopt the feedback
Prepare property alignment
- Request properties from development
- Review the design and development properties
- Create a property table in FigJam
- Highlight issues and note questions
Align properties
- Agree a naming convention for the anatomy
- Align the properties
Ready for development
- Create the Definition of Ready in Figma
- Use auto layout
- Apply the agreed naming and properties
- Create design tokens
- Link all design tokens
- Review the component
- Publish with release notes
Document the design
- Link the component to your documentation platform
- Finalize the rationale
- Write out the usage
- Add do and don't examples
- Create an example with live copy
- Add accessibility guidelines
- Add design guidelines
- Add development guidelines
Fully compliant
- Published in Figma
- Published in Storybook
- Announced to the team